2. Installing OpenFAST
Guidelines and procedures for obtaining precompiled binaries or compiling OpenFAST from source code are described here. While there are multiple ways to achieve the same outcome, the OpenFAST team has developed a comprehensive and well-thought out system for installation, so the methods described here are the only officially supported and maintained paths for obtaining an OpenFAST executable.
Most users of OpenFAST will not require modifying or compiling the source code. For the simplest installation of OpenFAST without changing the source code, refer to the table in the Download binaries or Running OpenFAST with docker sections and read the corresponding documentation for specific instructions. For instructions on compiling, see Compile from source.
To manipulate OpenFAST files using python, see Install the openfast_io python wrapper.
2.1. Download binaries
For users who intend to run OpenFAST simulations without changing the
source code, installation with precompiled binaries is recommended.
The installation procedures are specific for each supported operating
system, and the table below maps operating systems to the method for
obtaining binaries. “Release” versions are well tested and stable versions
of OpenFAST. A new release corresponds to a merge from the dev
branch of the repository to the main branch along with a version tag.
“Prerelease” versions contain the latest commits to the dev branch
and may contain unstable code but will always have the latest features.
Operating System |
Method |
OpenFAST Version |
Docs Section |
|---|---|---|---|
Linux |
Conda |
Release, Prerelease |
|
macOS |
Conda |
Release, Prerelease |
|
macOS |
Homebrew |
Release |
|
Windows |
GitHub Releases |
Release |
2.1.1. Conda Installation
OpenFAST releases are distributed through the Anaconda package manager via the OpenFAST Conda Forge channel for macOS and Linux. The installation includes
OpenFAST glue-code executable
Available module drivers
C++ header files
The following commands describe how to create a new environment, install OpenFAST, and test the installation.
# Create a new conda environment
conda create -n openfast_env

# Install OpenFAST through the Conda Forge channel
conda install -c conda-forge openfast

# Test OpenFAST
which openfast
openfast -v

# Test the HydroDyn driver
which hydrodyn_driver
hydrodyn_driver -v
Prereleases can be installed via conda by specifying the dev label,
as shown below.
conda install -c conda-forge/label/dev openfast
These are always the latest commits to the dev branch
of the repository and contain the latest changes to OpenFAST, but these
builds are not as well tested as the full release versions.
2.1.2. Homebrew Installation
For macOS systems, OpenFAST releases are distributed through the Homebrew package manager. The installation includes only the OpenFAST glue-code executable.
To install with Homebrew and test the installation, use the following commands.
# Update Homebrew
brew update

# Install OpenFAST
brew search openfast
brew install openfast

# Test OpenFAST
which openfast
openfast -v
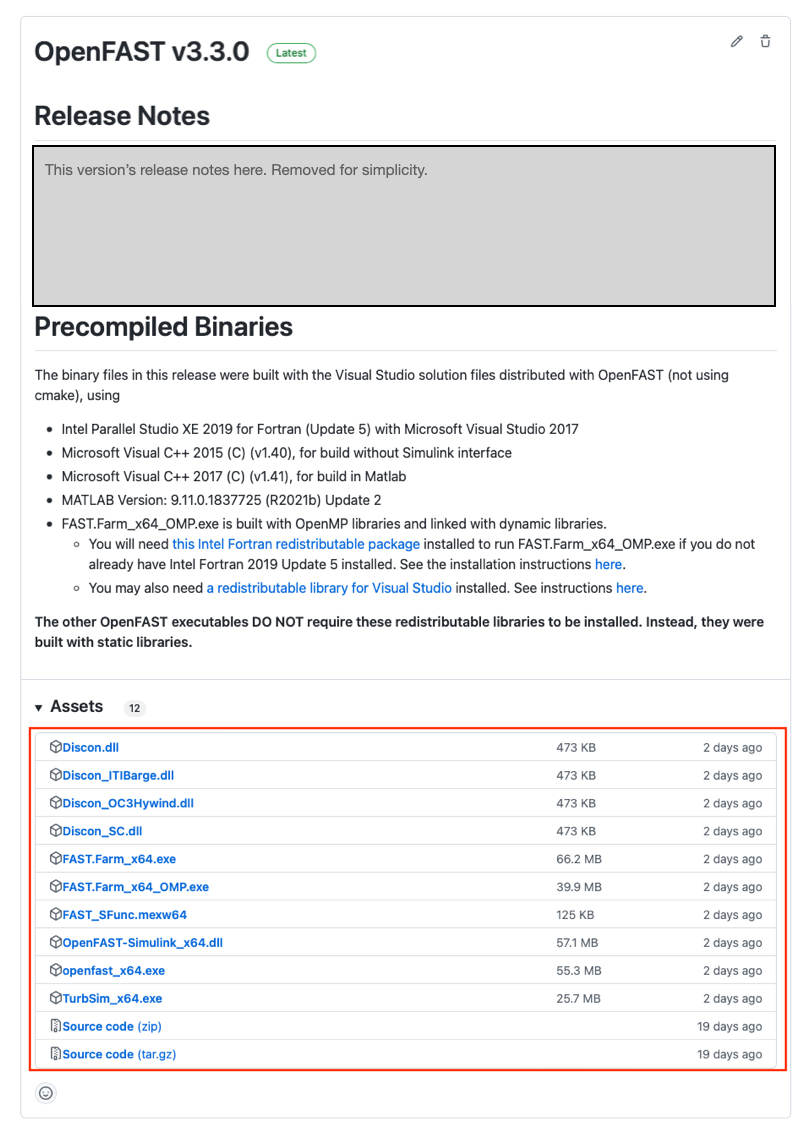
2.1.3. GitHub Releases
For Windows systems only, precompiled binaries are made available for each release on the OpenFAST GitHub Releases page. The binaries are compiled with the Intel Fortran compiler version 2020.
Important
The precompiled binaries require either the Intel Fortran compiler or the Intel MKL redistributable libraries, which are not by default included with the binaries. To configure the libraries, download the installers from the bottom of this page. If you have a Command Prompt open, you will need to close it after installing the libraries in order for the changes to take effect. Admin privileges are required to install the Intel libraries.
The OpenFAST executables can be downloaded from the “Assets” dropdown in each Release. The two assets named “Source code” are not needed.
The zipped file contains the following items:
File Name |
Description |
|---|---|
openfast_Win32.exe |
32-bit single precision |
openfast_x64.exe |
64-bit single precision |
openfast_x64_double.exe |
64-bit double precision |
Map_Win32.dll |
32-bit MAP++ library |
Map_x64.dll |
64-bit MAP++ library |
DISCON_DLLS/<64bit or Win32>/DISCON.dll |
Controller library for Jonkman 5-MW (formerly called the NREL 5-MW) |
DISCON_DLLS/<64bit or Win32>/DISCON_ITIBarge.dll |
Controller library for Jonkman 5-MW (formerly called the NREL 5-MW) - ITI Barge |
DISCON_DLLS/<64bit or Win32>/DISCON_OC3Hywind.dll |
Controller library for Jonkman 5-MW (formerly called the NREL 5-MW) - OC3 Hywind |
After extracting the contents, the OpenFAST executables can be tested by opening a command prompt, moving into the directory containing the executables, and running a simple test command:
cd C:\your\path\Desktop\openfast_binaries\
openfast_x64.exe /h
2.2. Running OpenFAST with docker
OpenFAST is available to be run on docker starting with version 3.5.3. Three approaches are shared below.
2.2.1. Using a docker image from Docker hub
Multiple versions of OpenFAST are also available as docker images from our docker registry. To pull and run one with files from your local machine available, run:
docker run --rm -it --volume=/path/to/files:/files nrel/openfast:latest openfast /files/main.fst
This command deletes the container (but not the image) when the analysis is finished and leaves the outputs in the same local directory as the input files.
You can also run commands interactively inside the container with:
docker run --rm -it --volume=/path/to/files:/files nrel/openfast:latest /bin/bash
To pull a specific release, substitute the version number in place of latest in the above commands (i.e. nrel/openfast:3.5.3).
2.2.2. Using a docker image from GitHub container registry
In addition to images hosted on Docker hub, we also host docker images on our GitHub container registry. The commands for pulling an image from the GitHub container repository are similar to those for pulling and running from Docker hub.
To pull and run with local files:
docker run --rm -it --volume=/path/to/files:/files ghcr.io/openfast/openfast:latest openfast /files/main.fst
For running the container interactively:
docker run --rm -it --volume=/path/to/files:/files ghcr.io/openfast/openfast:latest /bin/bash
To pull a specific release, substitute the version number in place of latest in the above commands (i.e. ghcr.io/openfast/openfast:3.5.3).
2.2.3. Build your own images
You can also build your own custom images using our Dockerfile or base your images on ours. See the Docker readme for more information on this.
2.3. Install the openfast_io python wrapper
The openfast_io python package is a wrapper comprising readers and writers for converting OpenFAST files to/from
python objects.
To use openfast_io as a library for incorporation into other scripts or tools, it is available via (assuming that you have already setup your python environment):
pip install openfast_io
These instructions are for interaction directly with the openfast_io source code.
Follow this step only if you have not cloned the OpenFAST repo:
git clone https://github.com/OpenFAST/OpenFAST.git
cd OpenFAST
Assuming you are within the OpenFAST directory:
cd openfast_io
pip install -e .
For more information and installation options, see the OpenFAST Python readme.
2.4. Compile from source
To compile from source code, the NLR OpenFAST team has developed an approach that uses CMake to generate build files for all platforms. Currently, CMake support for Visual Studio while doing active development is not well supported, so OpenFAST maintains a Visual Studio Solution giving Windows developers another option for writing code, compiling and debugging in a streamlined manner. See Visual Studio Solution for Windows for more information. If Visual Studio is not a requirement in Windows development, CMake is adequate. Background on CMake is given in Understanding CMake, and procedures for configuring and compiling are given in CMake with Make for Linux/macOS and CMake with Visual Studio for Windows.
For a guide to compiling on Windows with the linux subsystem, cmake, and VS code, see Windows with the linux subsystem and VS code.
Generally, the steps required to compile are:
Install Dependencies (Section Section 2.4.1)
Configure the build system (Visual Studio: Section 2.4.3, CMake: Section 2.4.5)
Compile and test binaries (Visual Studio: Section 2.4.3, CMake: Section 2.4.6 and Section 2.4.7 )
2.4.1. Dependencies
Compiling OpenFAST from source requires additional libraries and tools that are not distributed with the OpenFAST repository. Each of the following components are required for the minimum OpenFAST compilation.
C++, C, and Fortran compiler
BLAS and LAPACK math library
Build system
In many cases, these tools can be installed with a system’s package
manager (e.g. homebrew for macOS, yum for CentOS/Red Hat, or
apt for Debian-based systems like Ubuntu). For Ubuntu and macOS,
the following commands install all required dependencies.
System |
Dependency Installation Command |
|---|---|
Ubuntu 20.04 |
|
macOS 10.15 |
|
If dependencies are downloaded from vendors directly, they must be installed in a standard location for your system so that the OpenFAST build systems can find them.
2.4.1.1. Compilers
Compiling OpenFAST requires a C, C++, and Fortran compiler. Though many options exist, the most common and best supported compilers are listed below.
Vendor / Compiler |
Applicable systems |
Minimum version |
Link |
|---|---|---|---|
GNU Compiler Collection (gfortran, gcc, g++) |
macOS, Linux |
4.6.0 |
|
Intel Compilers (ifort, icc) |
All |
2013 |
https://software.intel.com/content/www/us/en/develop/tools/oneapi/hpc-toolkit.html |
Other compiler packages may work and can be well suited to a particular hardware, but their mileage may vary with OpenFAST. For instance, MinGW, CygWin, and LLVM are options for obtaining compilers on various systems. It is highly recommended to use the latest version of one of the above.
2.4.1.2. Math libraries
Math libraries with the BLAS and LAPACK interfaces are also required. All major options can be obtained as free downloads. The most common options are listed in the table below.
Library |
Distributor |
Open Source? |
Link |
|---|---|---|---|
BLAS/LAPACK |
NetLib |
Yes |
|
BLAS/LAPACK |
OpenBLAS |
Yes |
|
MKL |
Intel |
No |
https://software.intel.com/content/www/us/en/develop/tools/oneapi/components/onemkl.html |
2.4.1.3. Build tools
An environment-specific build system is required and may consist of a combination of the packages listed in the table below.
Package |
Applicable systems |
Minimum version |
Link |
|---|---|---|---|
CMake |
All |
3.12 |
|
GNU Make |
macOS, Linux |
1.8 |
|
Visual Studio |
Windows |
2015 |
For Windows, CMake may be used to generate a Visual Studio Solution that can then be used to compile OpenFAST. OpenFAST also contains a standalone Visual Studio project, see Visual Studio Solution for Windows.
For macOS and Linux, the recommended tools are CMake and GNU Make. CMake is used to generate Makefiles that are inputs to the GNU Make program. Other build tools exist for both Linux and macOS (Xcode, Ninja), but these are not well supported by the OpenFAST system.
2.4.2. Get the code
OpenFAST can be cloned (i.e., downloaded) from its Github repository via the command line:
git clone https://github.com/OpenFAST/OpenFAST.git
An archive of the source code can also be downloaded directly from these links:
“main” branch - Stable release
“dev” branch - Latest updates
2.4.3. Visual Studio Solution for Windows
A complete Visual Studio solution is maintained for working with the OpenFAST on Windows systems. The procedure for configuring the system and proceeding with the build process are documented in the following section:
2.4.4. Windows with the linux subsystem and VS code
This guide provides step-by-step instructions for compiling OpenFAST from source on Windows using WSL (Windows Subsystem for Linux), setting up a Python environment with pyOpenFAST, and configuring VS Code for development and testing with Jupyter notebooks.
2.4.5. Understanding CMake
To more fully understand CMake and its methodology, visit this guide on running CMake.
CMake is a build configuration system that creates files as input to a build
tool like GNU Make, Visual Studio, or Ninja. CMake does not compile code
or run compilers directly, but
rather creates the environment needed for another tool to run compilers and
create binaries. A CMake project is described by a series of files called
CMakeLists.txt located in directories throughout the project. The main
CMake file for OpenFAST is located at openfast/CMakeLists.txt and each
module and glue-code has its own CMakeLists.txt; for example, AeroDyn
and BeamDyn have one at openfast/modules/aerodyn/CMakeLists.txt and
openfast/modules/beamdyn/CMakeLists.txt, respectively.
2.4.5.1. Running CMake
Running CMake and a build tool will create many files (text files and binaries)
used in the various stages of the build. For this reason, a build folder
should be created to contain all of the generated files associated with the
build process. Here, an important file called CMakeCache.txt contains the
user-defined settings for the CMake configuration. This file functions like
memory storage for the build. It is initially created the first time the CMake
command is run and populated with the initial settings. Then, any subsequent
changes to the settings will be updated and stored there.
CMake can be executed in a few ways:
Command line interface:
cmakeCommand line curses interface:
ccmakeOfficial CMake GUI
The CMake GUI is only distributed for Windows, but it can be built from source for other platforms. OpenFAST’s build process focuses on the command line execution of CMake for both the Linux/macOS and Windows terminals. The command line syntax to run CMake for OpenFAST is generally:
cmake <path-to-primary-CMakeLists.txt> [options]

Options
    -D <var>[:<type>]=<value>    = Create or update a cmake cache entry.
For example, a common CMake command issued from the openfast/build
directory is:
# cmake <path-to-primary-CMakeLists.txt> [options]
#   where
#     <path-to-primary-CMakeLists.txt> is ".."
#     [options] can be
#       -DBUILD_SHARED_LIBS:BOOL=ON or
#       -DBUILD_SHARED_LIBS=ON

cmake .. -DBUILD_SHARED_LIBS=ON
The command line curses interface can be invoked similarly:
ccmake ..
The interface will be rendered in the terminal window and all navigation happens through keyboard inputs.
2.4.5.2. OpenFAST CMake options
CMake has a large number of general configuration variables available. A good resource for useful CMake variables is at this link: GitLab CMake variables. The CMake API documentation is also helpful for searching through variables and determining the resulting action. Note that the CMake process should be well understood before customizing the general options.
The CMake options specific to OpenFAST and their default settings are:
BUILD_DOCUMENTATION            - Build documentation (Default: OFF)
BUILD_FASTFARM                 - Enable FAST.Farm capabilities (Default: OFF)
BUILD_OPENFAST_CPP_API         - Enable building OpenFAST - C++ API (Default: OFF)
BUILD_OPENFAST_CPP_DRIVER      - Enable building OpenFAST C++ driver using C++ CFD API (Default: OFF)
BUILD_OPENFAST_LIB_DRIVER      - Enable building OpenFAST driver using C++ Library API (Default: OFF)
BUILD_OPENFAST_SIMULINK_API    - Enable building OpenFAST for use with Simulink (Default: OFF)
BUILD_SHARED_LIBS              - Enable building shared libraries (Default: OFF)
BUILD_TESTING                  - Build the testing tree (Default: OFF)
BUILD_UNIT_TESTING             - Enable unit testing (Default: ON)
CMAKE_BUILD_TYPE               - Choose the build type: Debug Release (Default: Release)
CMAKE_Fortran_MODULE_DIRECTORY - Set the Fortran Modules directory
CMAKE_INSTALL_PREFIX           - Install path prefix, prepended onto install directories.
CMAKE_MACOSX_RPATH             - Use RPATH runtime linking (Default: ON)
CODECOVERAGE                   - Enable infrastructure for measuring code coverage (Default: OFF)
DOUBLE_PRECISION               - Treat REAL as double precision (Default: ON)
FPE_TRAP_ENABLED               - Enable Floating Point Exception (FPE) trap in compiler options (Default: OFF)
GENERATE_TYPES                 - Use the openfast-registry to autogenerate types modules (Default: OFF)
OPENMP                         - Enable OpenMP support (Default: OFF)
WIN_DLL_LOAD                   - Enable loading of Windows DLLs for OrcaFlex and SoilDyn (Default: ON)
USE_DLL_INTERFACE              - Enable runtime loading of dynamic libraries (Default: ON)
USE_LOCAL_STATIC_LAPACK        - Enable downloading and building static LAPACK and BLAS libs (Default: OFF)
VARIABLE_TRACKING              - Enables variable tracking for better runtime debugging output. May increase compile time. Valid only for GNU. (Default: ON)
Additional system-specific options may exist for a given system, but those should not impact the OpenFAST configuration. As mentioned above, the configuration variables are set initially but can be changed at any time. For example, the defaults may be accepted to initially configure the project, but then the settings may be configured individually:
# Initial configuration with the default settings
cmake ..

# Change the build to Debug mode rather than Release
cmake .. -DCMAKE_BUILD_TYPE=Debug

# Use dynamic linking rather than static linking
cmake .. -DBUILD_SHARED_LIBS=ON
The commands above are equivalent to having run this command the first time:
# Initial configuration in Debug mode with dynamic linking
cmake .. -DCMAKE_BUILD_TYPE=Debug -DBUILD_SHARED_LIBS=ON
2.4.5.2.1. CMAKE_BUILD_TYPE
This option allows to set the compiler optimization level and debug information. The value and its effect are listed in the table below.
CMAKE_BUILD_TYPE |
Effect |
|---|---|
Release |
|
RelWithDebInfo |
|
MinSizeRel |
|
Debug |
No optimization and -g flag for debug info; additional debugging flags: |
Use Debug during active development to add debug symbols for use with a
debugger. This build type also adds flags for generating runtime checks that
would otherwise result in undefined behavior. MinSizeRel adds basic
optimizations and targets a minimal size for the generated executable. The next
level, RelWithDebInfo, enables vectorization and other more aggressive
optimizations. It also adds debugging symbols and results in a larger
executable size. Finally, use Release for best performance at the cost
of increased compile time.
This flag can be set with the following command:
cmake .. -DCMAKE_BUILD_TYPE=RelWithDebInfo
2.4.5.2.2. CMAKE_INSTALL_PREFIX
This flag sets the location of the compiled binaries when the build
tool runs the install command. It should be a full path in a carefully
chosen location. The binaries will be copied into include, lib,
and bin subfolders under the value of this flag. The default is to
install binaries within the repository in a folder called install.
This flag can be set with the following command:
cmake .. -DCMAKE_INSTALL_PREFIX="/usr/local/"
2.4.5.3. Setting the build tool
CMake can target a variety of build tools or generators. To obtain a list of available generators on the current system, run with the empty generator flag, select the target from the list, and rerun with the generator flag populated:
# Run with the empty -G flag to get a list of available generators
cmake .. -G

# CMake Error: No generator specified for -G
#
# Generators
# * Unix Makefiles               = Generates standard UNIX makefiles.
# Ninja                        = Generates build.ninja files.
# Xcode                        = Generate Xcode project files.
# CodeBlocks - Ninja           = Generates CodeBlocks project files.
# CodeBlocks - Unix Makefiles  = Generates CodeBlocks project files.
# CodeLite - Ninja             = Generates CodeLite project files.
# CodeLite - Unix Makefiles    = Generates CodeLite project files.
# Sublime Text 2 - Ninja       = Generates Sublime Text 2 project files.
# Sublime Text 2 - Unix Makefiles
#                              = Generates Sublime Text 2 project files.
# Kate - Ninja                 = Generates Kate project files.
# Kate - Unix Makefiles        = Generates Kate project files.
# Eclipse CDT4 - Ninja         = Generates Eclipse CDT 4.0 project files.
# Eclipse CDT4 - Unix Makefiles= Generates Eclipse CDT 4.0 project files.

# Choose one from the list above and pass it as an argument after -G
#   NOTE: wrap this is in quotes!
cmake .. -G"Sublime Text 2 - Ninja"
Note
If the chosen generator name contains spaces, be sure to wrap it in quotes.
2.4.5.4. Math libraries
The CMake project is configured to search for the required math libraries
in default locations. However, if math libraries are not found, they can
be specified directly to CMake. The two required libraries are BLAS
and LAPACK, and their location can be passed to CMake with this command
syntax:
cmake .. -DBLAS_LIBRARIES="/path/to/blas" -DLAPACK_LIBRARIES="/path/to/lapack"
The paths given should be to the directory which contains the libraries, not to the libraries themselves.
2.4.6. CMake with Make for Linux/macOS
After installing all dependencies and reading Understanding CMake, proceed with configuring OpenFAST. The CMake project is well developed for Linux and macOS systems, so the default settings should work as given. These settings should only be changed when a custom build is required.
The full procedure for installing dependencies, configuring CMake and compiling with GNU Make on Linux and macOS systems is given below.
# For Ubuntu Linux, this installs all dependencies
apt install git cmake libblas-dev liblapack-dev gfortran-10 g++

# For macOS using Homebrew, this installs all dependencies
brew install git cmake make openblas gcc

# Clone the repository from GitHub using git
git clone https://github.com/OpenFAST/OpenFAST.git

# Move into the OpenFAST directory
cd OpenFAST

# Create the build directory and move into it
mkdir build
cd build

# Execute CMake with the default options;
# this step creates the Makefiles
cmake ..

# Execute the Make-help command to list all available targets
make help

# Choose a particular target or give no target to compile everything
make hydrodyn_driver
# or
make openfast
# or
make

# Test the compiled binary, for example
./glue-codes/openfast/openfast -v
./modules/hydrodyn/hydrodyn_driver -v

# Move the binaries and other run-time files to the install location
# The default is `openfast/install`
make install
Tip
Compile in parallel by adding “-jN” to the make command where N is
the number of parallel processes to use; i.e. make -j4 openfast.
This will build the OpenFAST project in the build directory. Binaries are
located in openfast/build/glue-codes/ and openfast/build/modules/. Since
all build-related files are located in the build directory, a new fresh build
process can be accomplished by simply deleting the build directory and starting
again.
2.4.7. CMake with Visual Studio for Windows
After installing all dependencies and reading Understanding CMake, proceed with configuring OpenFAST. The result of this configuration process will be a Visual Studio solution which will be fully functional for compiling any of the targets within OpenFAST. However, this method lacks support for continued active development. Specifically, any settings that are configured in the Visual Studio solution directly will be lost any time CMake is executed. Therefore, this method should only be used to compile binaries, and the procure described in Visual Studio Solution for Windows should be used for active OpenFAST development on Windows.
The procedure for configuring CMake and compiling with Visual Studio on Windows systems is given below.
# Clone the repository from GitHub using git
git clone https://github.com/OpenFAST/OpenFAST.git

# Move into the OpenFAST directory
cd OpenFAST

# Create the build directory and move into it
mkdir build
cd build

# Execute CMake with the default options and a specific Visual Studio version
# and build architecture. For a list of available CMake generators, run
# ``cmake .. -G``.
# This step creates the Visual Studio solution.
cmake .. -G "Visual Studio 16 2019"

# Open the generated Visual Studio solution
start OpenFAST.sln
Visual Studio will open a solution containing all of the OpenFAST projects,
and any module library, module driver, or glue-code can be compiled from there.
The compiled binaries are located within a directory determined by the Visual
Studio build type (Release, Debug, or RelWithDebInfo) in
openfast/build/glue-codes/ and openfast/build/modules/. For example, the
OpenFAST executable will be located at openfast/build/glue-codes/Release/openfast.exe
when compiling in Release mode.
The CMake-generated Visual Studio build is not currently fully functional. Any configurations made to the Solution in the Visual Studio UI will be lost when CMake is executed, and this can happen whenever a change is made to the structure of the file system or if the CMake configuration is changed. It is recommended that this method not be used for debugging or active development on Windows. Instead, see Visual Studio Solution for Windows.
2.5. C++ API
When compiling the C++ API, the following additional dependencies are required:
The C++ API is compiled only with CMake and it is possible to hint to CMake where to find some dependencies. The following commands configure CMake and compile the C++ interface.
# Enable compiling the C++ API
cmake .. -DBUILD_OPENFAST_CPP_API:BOOL=ON -DBUILD_SHARED_LIBS:BOOL=ON

# If CMake doesn't find HDF5, provide a hint
cmake .. -DHDF5_ROOT:STRING=/usr/lib/

# Compile the C++ API
make openfastcpplib
2.6. FAST.Farm
The FAST.Farm glue-code is included in the CMake project similar to the OpenFAST glue-code. See Compile from source for a full description on installing dependencies, configuring the project, and compiling. FAST.Farm is enabled in the CMake project with an additional flag:
# Enable compiling FAST.Farm
cmake .. -DBUILD_FASTFARM:BOOL=ON

# Compile FAST.Farm
make FAST.Farm
OpenMP-Fortran is an additional dependency for FAST.Farm. These libraries can be installed with any package manager for macOS and Linux or through the Intel oneAPI distributions.
2.7. Simulink
To build the MEX function for coupling OpenFAST into Simulink, there are two options depending on platform.
2.7.1. Windows with Visual Studio
For Windows, build with the Release_Matlab option from the Visual Studio project in vs-build/FAST/FAST.sln. Then run glue-codes/simulink/src/create_FAST_SFunc.m from MATLAB (instructions at the top of this file).
2.7.2. CMake
For CMake builds on all platforms, enable the -DBUILD_OPENFAST_SIMULINK_API=On option in CMake and build the FAST_SFunc target. This will place the resulting FAST_SFunc.mexXXXX in <build-dir>/glue-codes/simulink/FAST_SFunc.mexXXXX (and in the install directory at install/bin/FAST_SFunc.mexXXXX if make install was called).
2.8. Appendix
The following are additional methods for installation which may not be fully test or may be deprecated in the future.